Cloudflare Integration
Overview
SEOJuice supports server-side rendering through Cloudflare Workers, allowing you to integrate SEO optimizations directly into your infrastructure.
Setup Process
Step 1: Access Website Settings
Navigate to your Website Settings in SEOJuice to add your Cloudflare Token. The system requires permissions to add and edit Workers for automatic integration.
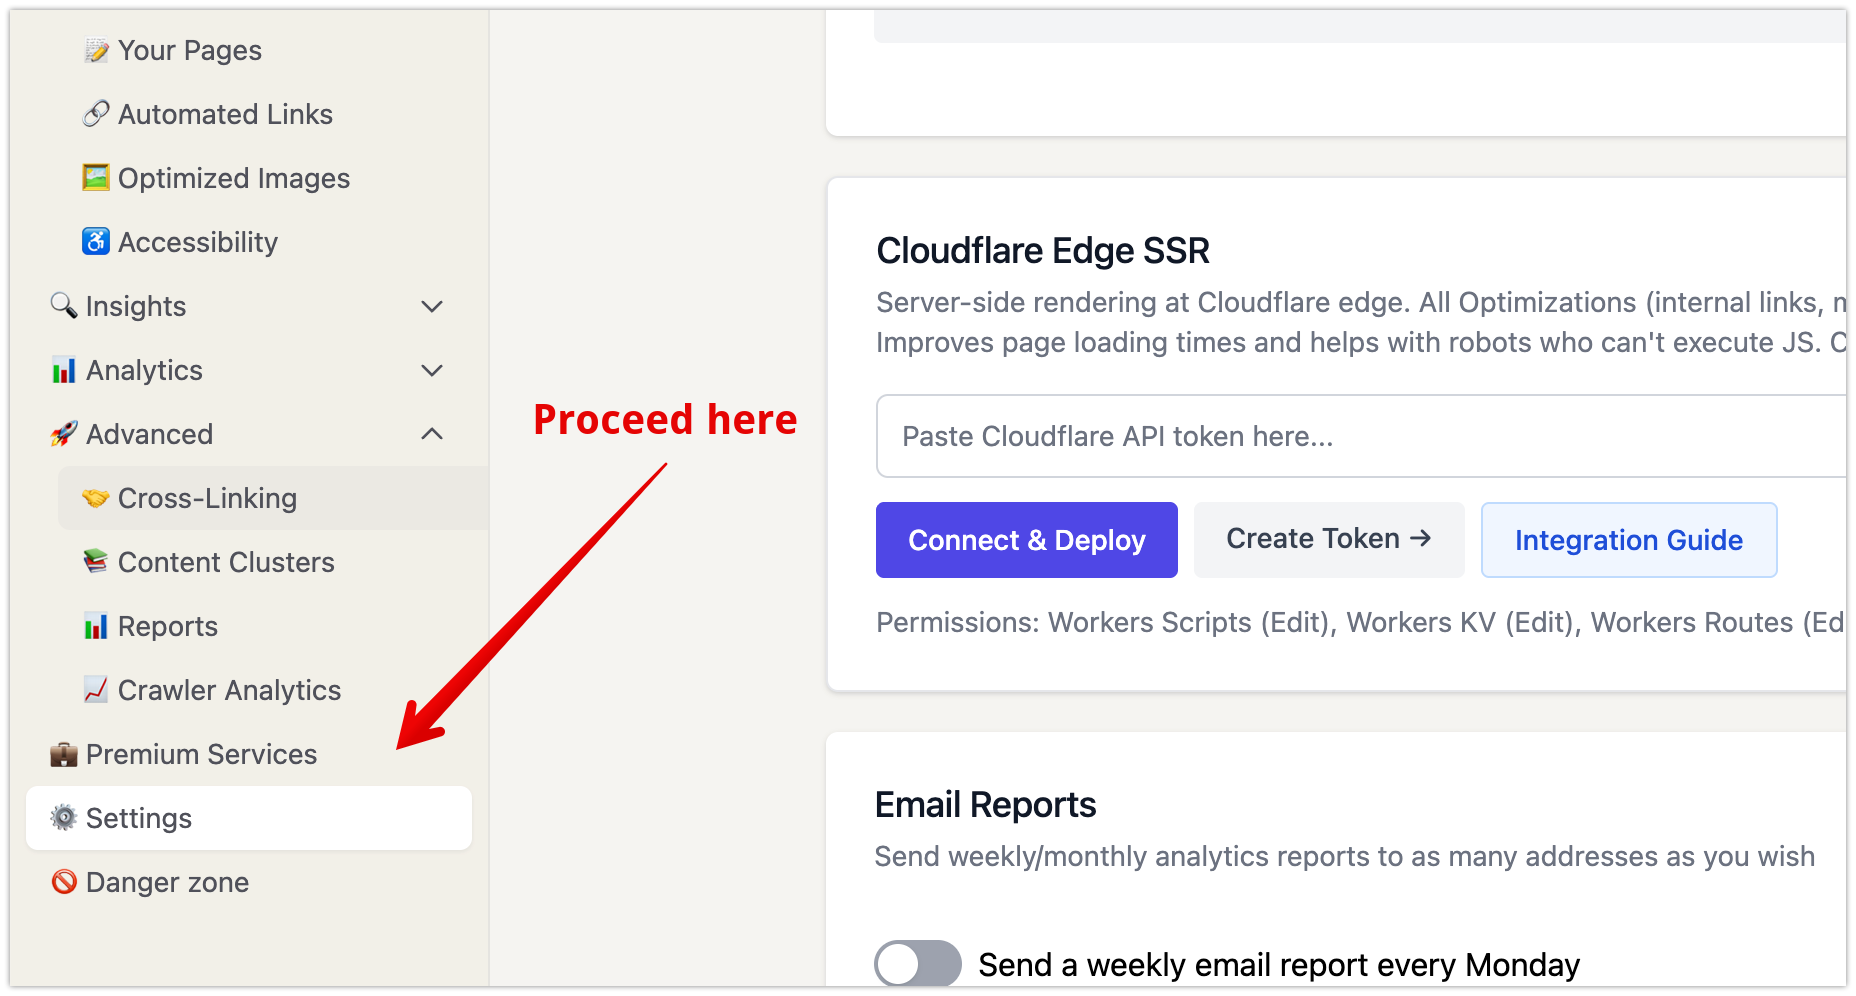
Step 2: Create a Cloudflare Token
Click the “Create a Token” button to be directed to the Cloudflare Dashboard where you can generate a new token.

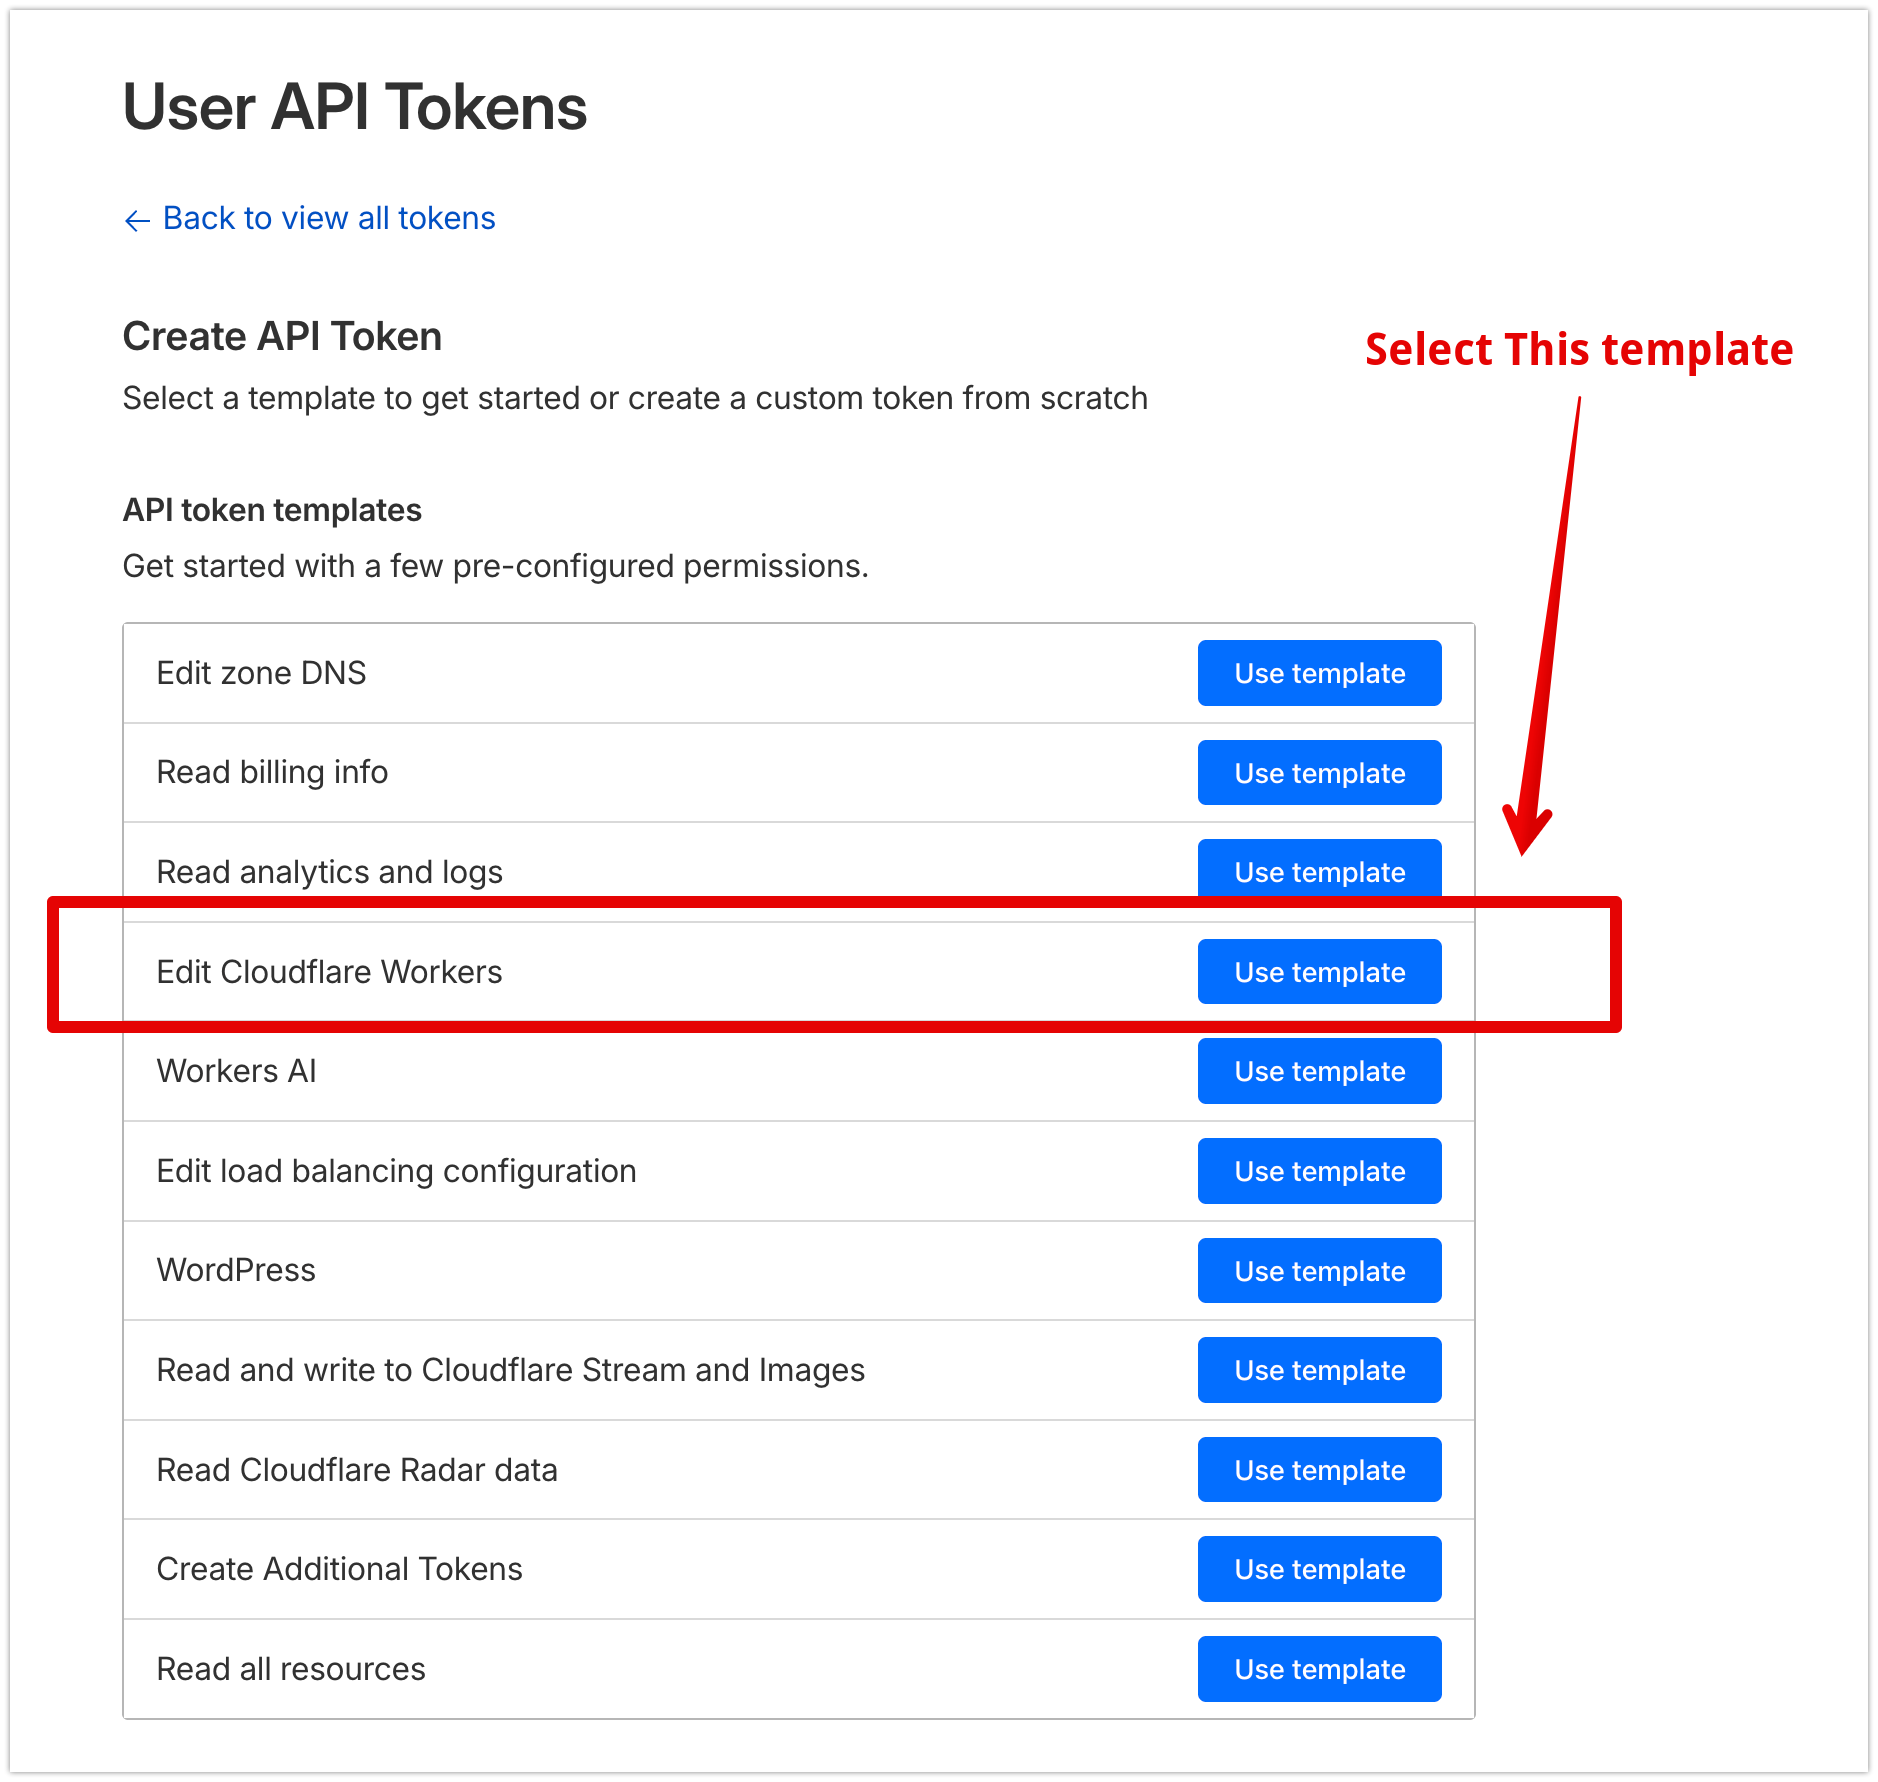
Step 3: Select Token Template
On the token creation page, choose the Edit Cloudflare Workers template, which comes with necessary permissions pre-selected.
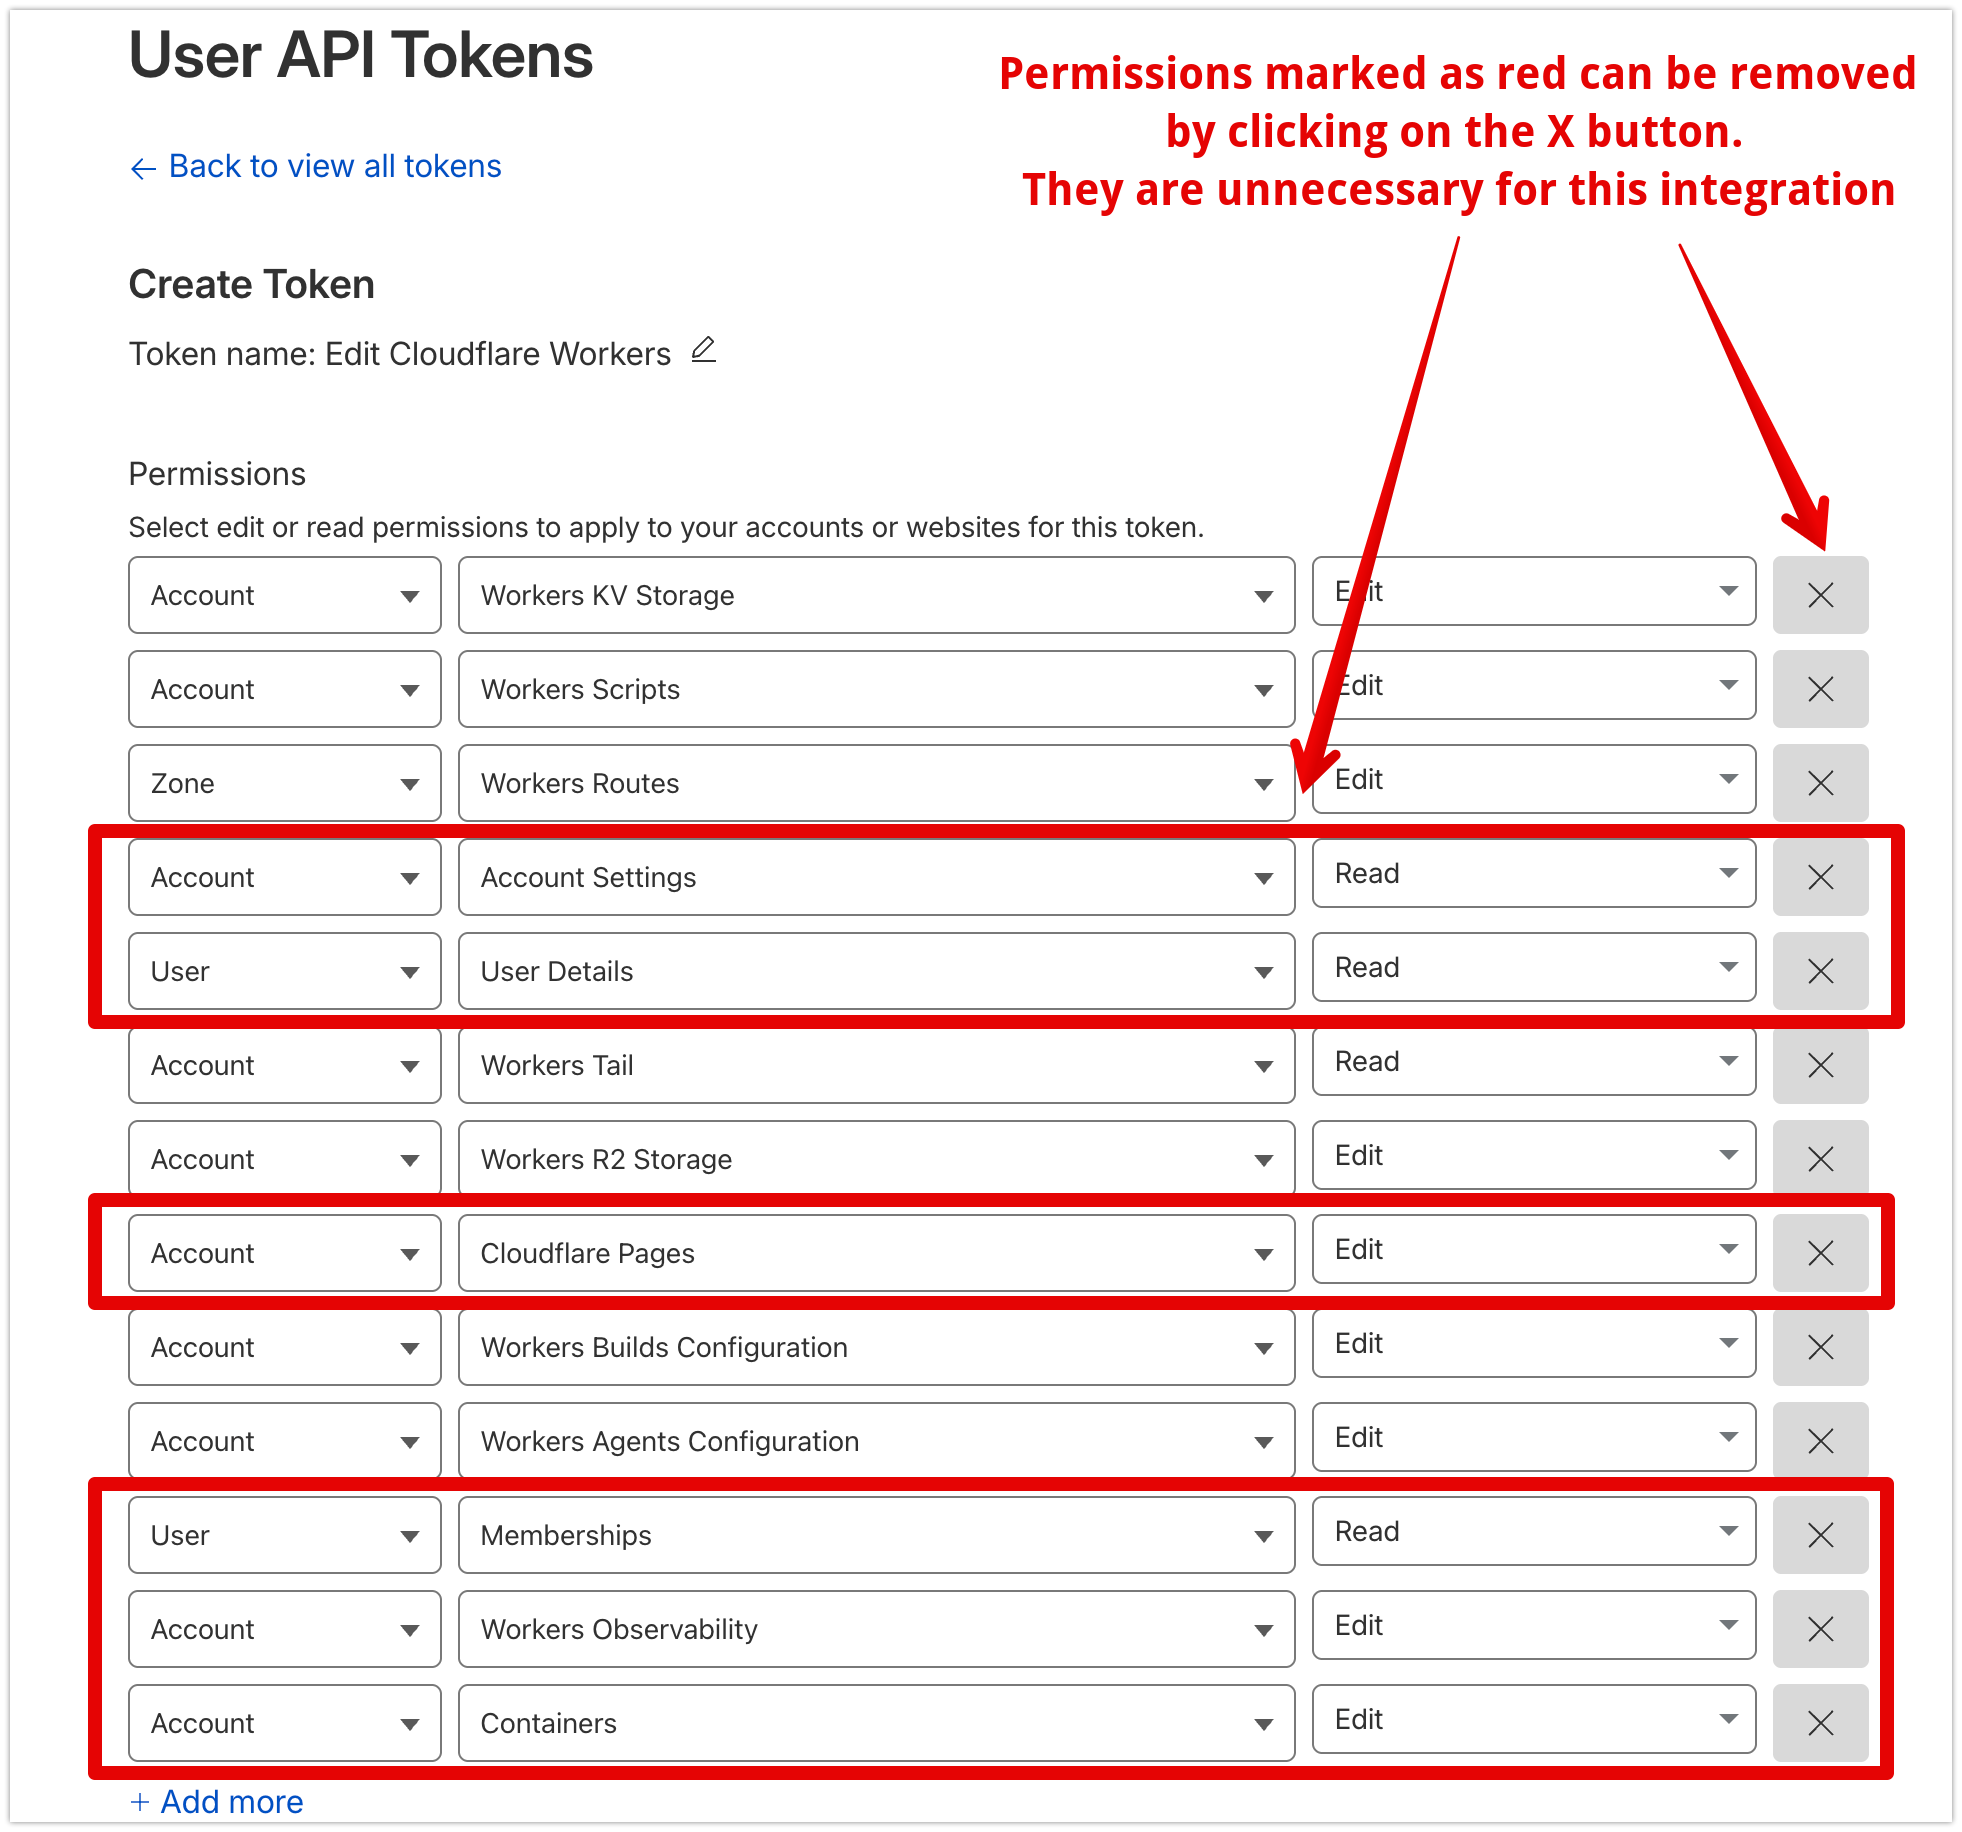
Step 4: Customize Permissions
Optionally remove any unnecessary permissions from the template based on your security requirements.
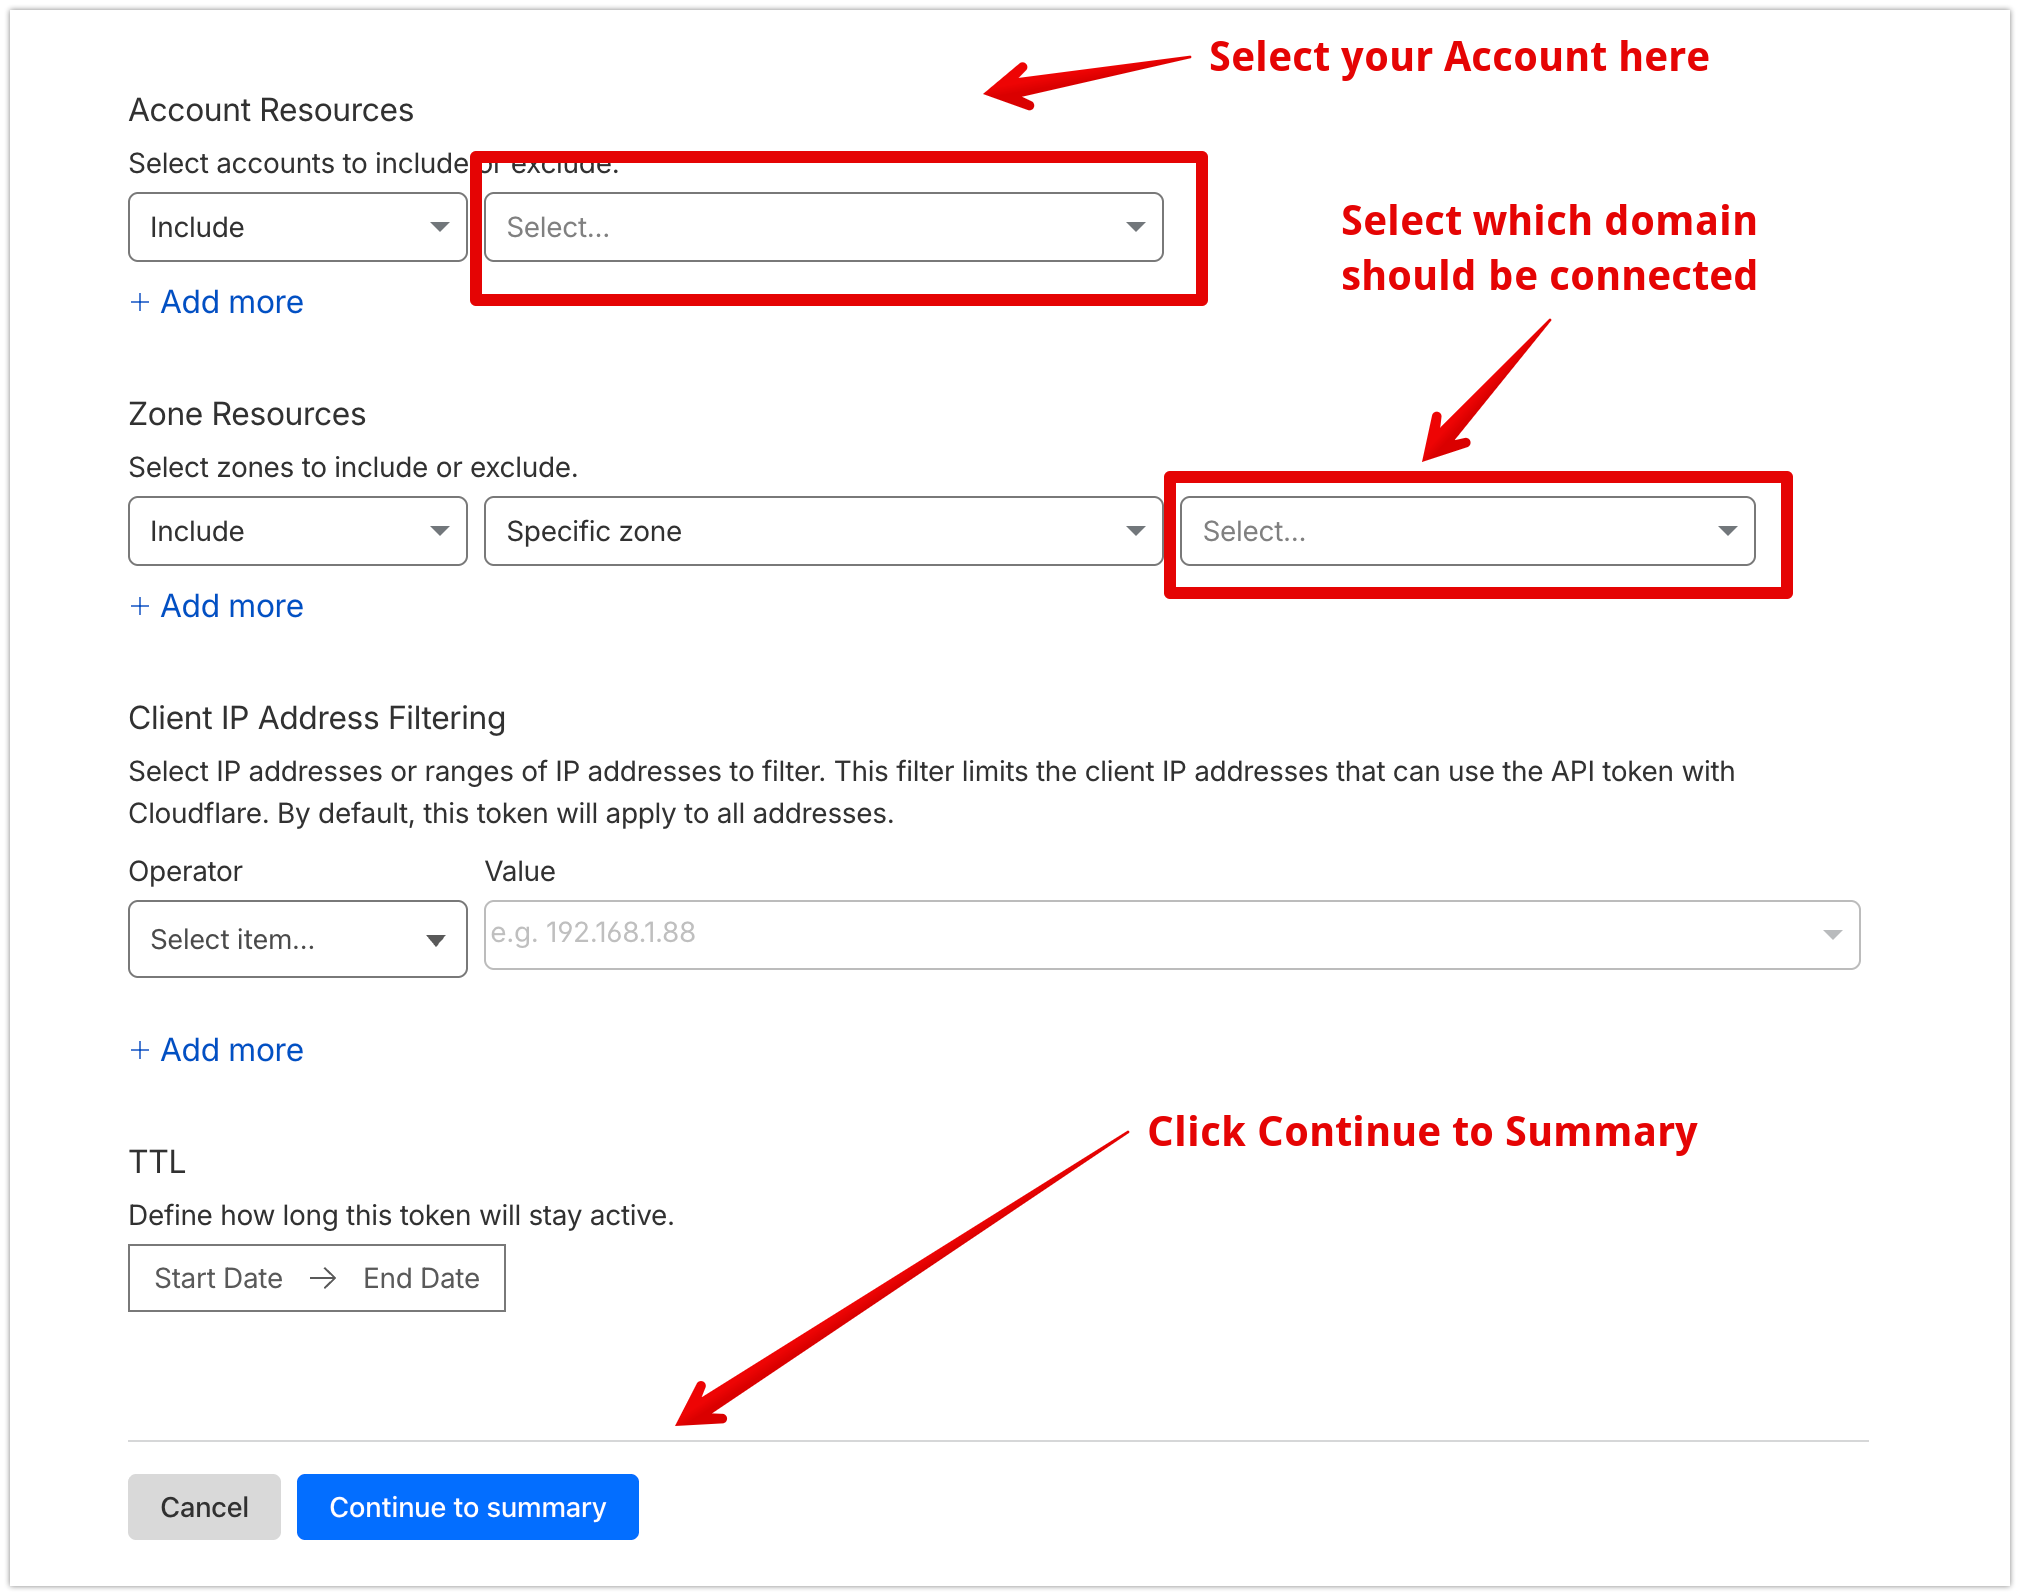
Step 5: Select Account and Domain
Choose your Cloudflare account and specify the domain you wish to connect to SEOJuice.
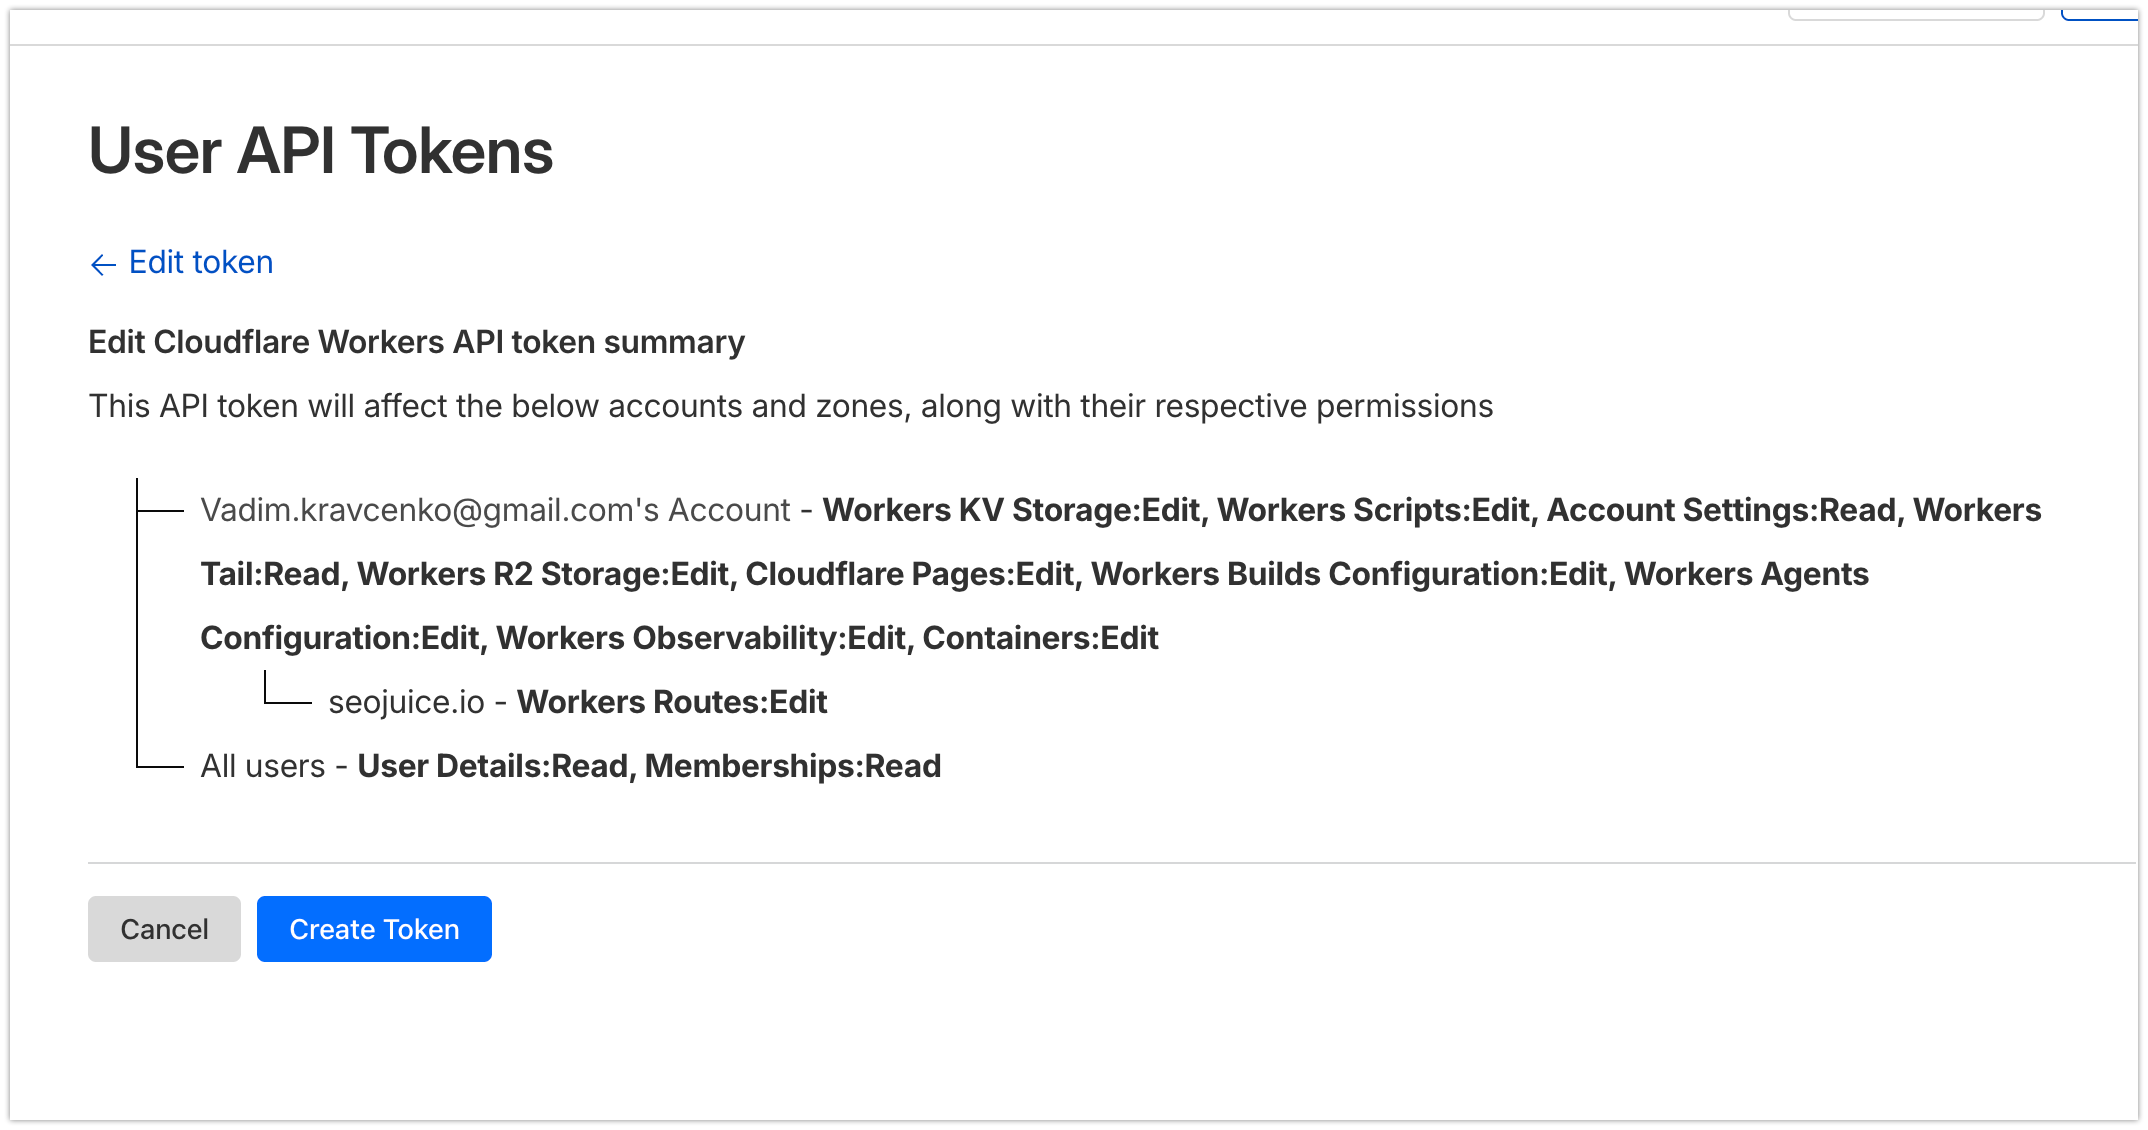
Step 6: Review Permissions Summary
Verify the permissions configuration on the summary page before proceeding.
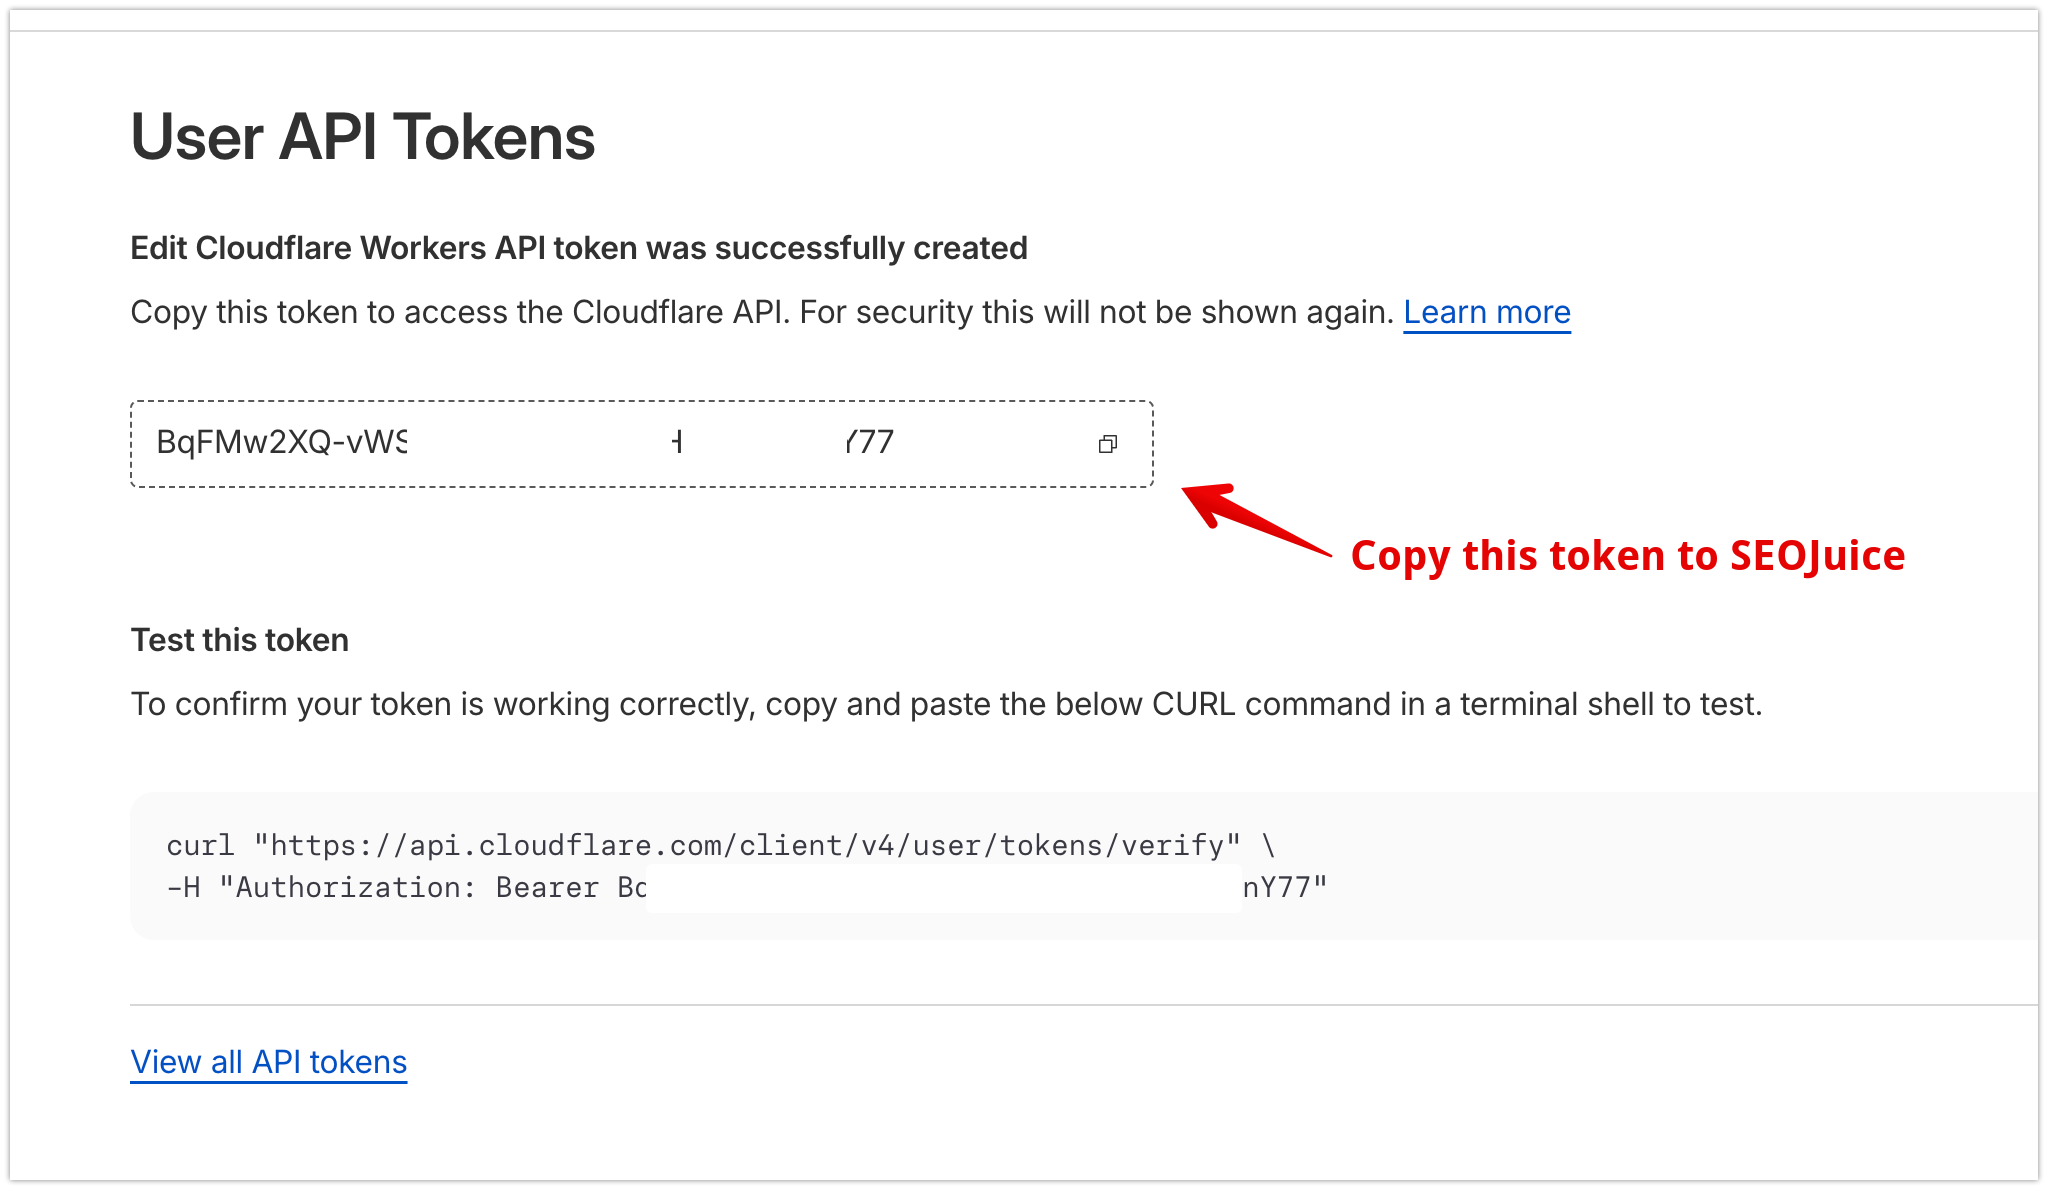
Step 7: Create and Copy Token
Confirm the permissions and create your token. Copy the generated token from the confirmation page.
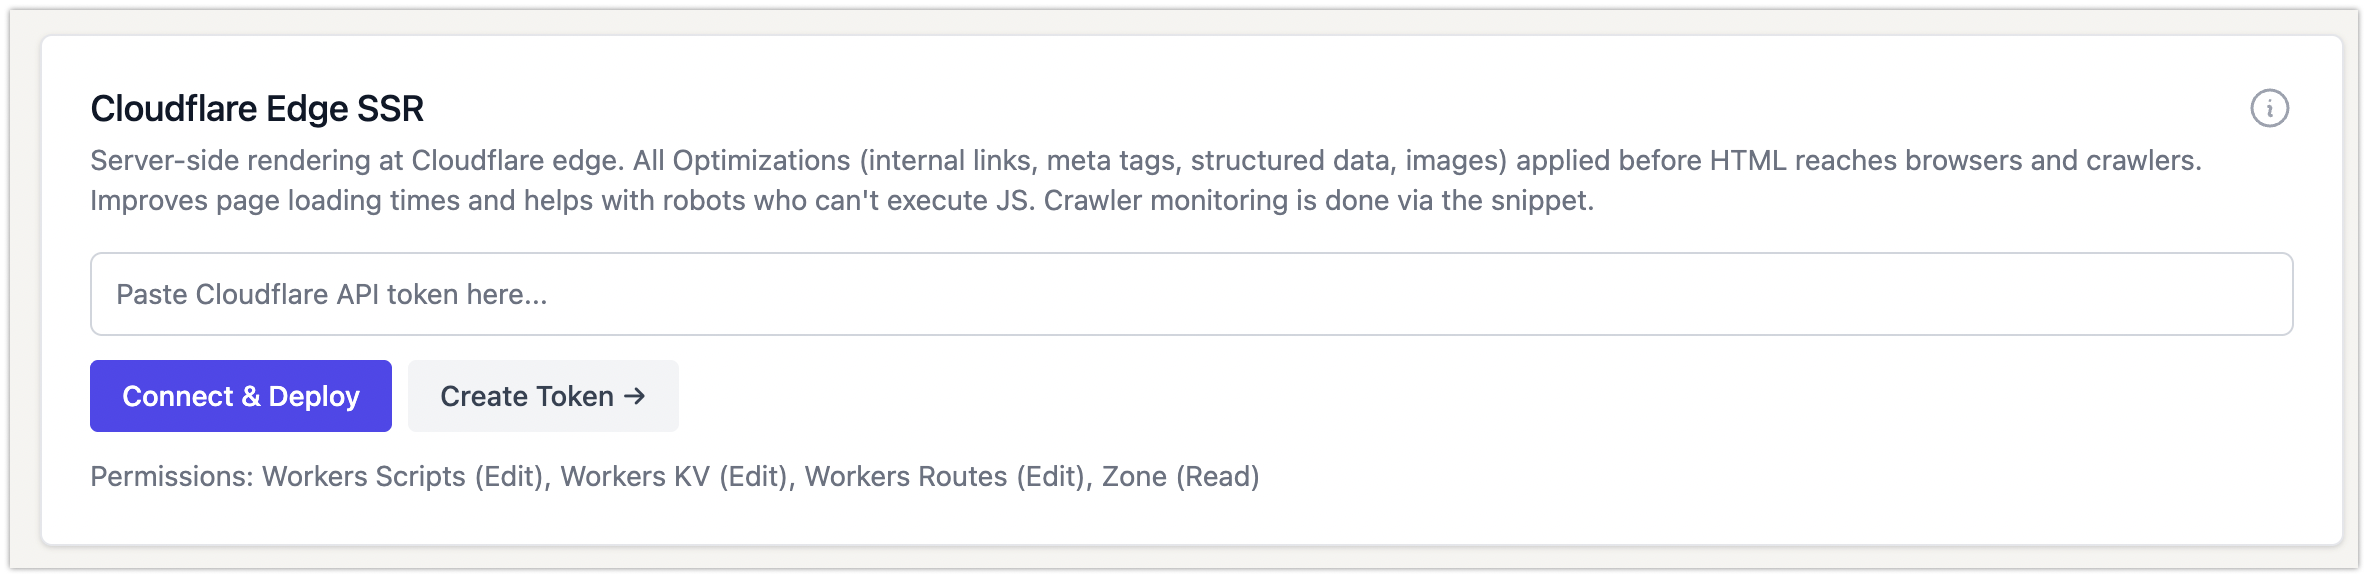
Step 8: Connect to SEOJuice
Paste your token into the SEOJuice platform field and click Connect & Deploy. This automatically creates a worker that you can review later if needed.

Step 9: Review Worker (Optional)
Click View Worker in Cloudflare to access and manage the integration directly within your Cloudflare dashboard.